Take better photos at home – Light
April 17, 2020
We are all at home but that doesn’t mean that life stops. There are still birthdays, memorable moments (baby’s first steps) and even weddings to capture! This is the first of a series of posts with the goal to help folks at home take better photos on their phone.
There are many ways to go about capturing beautiful images and I’m sharing one tip you can easily start incorporating today!
The first thing I’m sharing about is light. Light is ultimately the magic behind every image! There are many ways to use light in a photograph. For the sake of practicality I want to limit this post to a nugget of information that will instantly change your images today. So here it is, nugget number one:
shoot your photos with a window “behind” your back, off to one side.
If you are photographing someone in your home or even an object, find a window with some soft light pouring in (if the sun is blasting your subject then move further from the window where the light softens or to a window on the other side of the house) be sure to stand to one side or the other of the window so you aren’t casting a shadow on your subject. Now that you’ve spent a few moments setting things up, have some fun! Play around, try taking photos from different spots and with your subject looking in different directions; later go back and look at each image. How did it change the light on your subject? Is one image more flattering than another?
As you begin to do this more it will become more of a habit. You won’t always have a choice to move your subject to get the perfect light and it certainly isn’t worth missing a moment over. However, the more you practice this habit, the more you’ll realize you do have a choice on where you stand when you take a photograph. Taking 10 to 20 seconds to move yourself can make all the difference!
I’ve shared an example in our home below!
To keep it simple the images were shot on my phone and I did the EXACT SAME editing on ALL the photographs I’m sharing with you (the adjustments I made: an increase in exposure by one stop and an increase in the contrast just a touch – all things you can do on your phone btw).
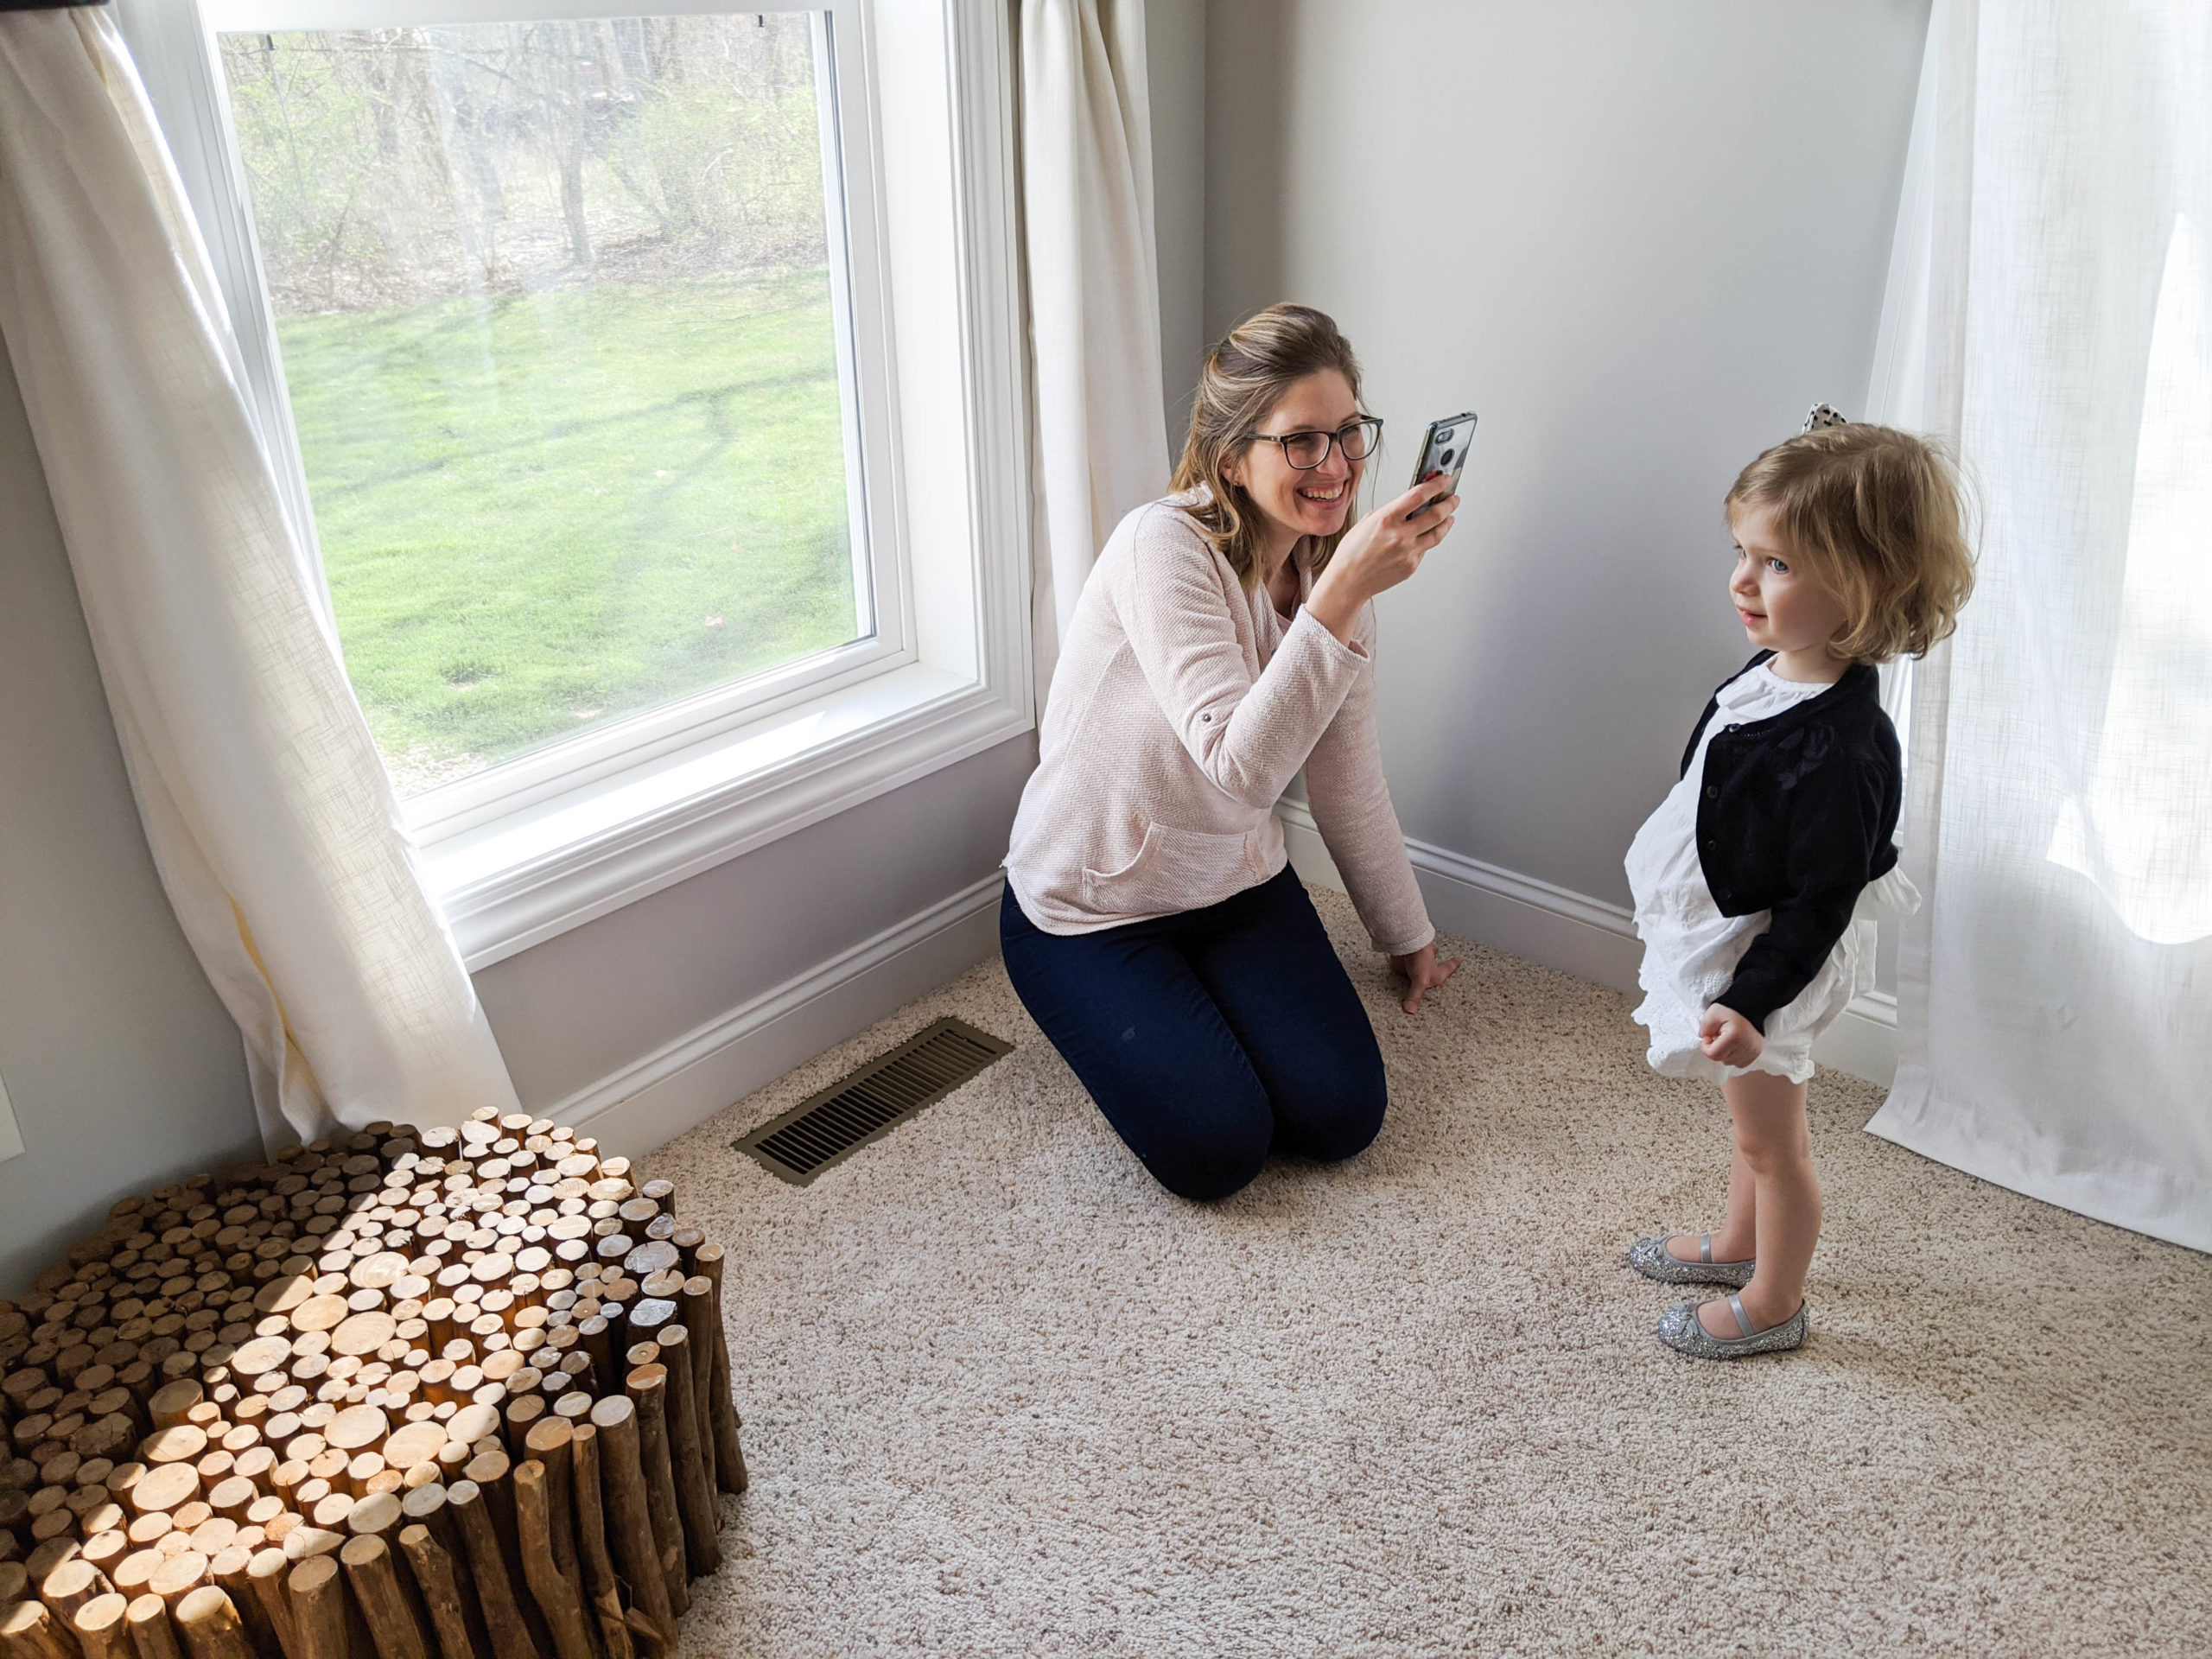
The first image I’m sharing is what you typically want to avoid. You’ll see that I am photographing my daughter in front of the window as she does the two year old tilt (totally just made that up it’s not a real thing…that I know of). Notice the dark shadows on the right side of her face and under her eyes?
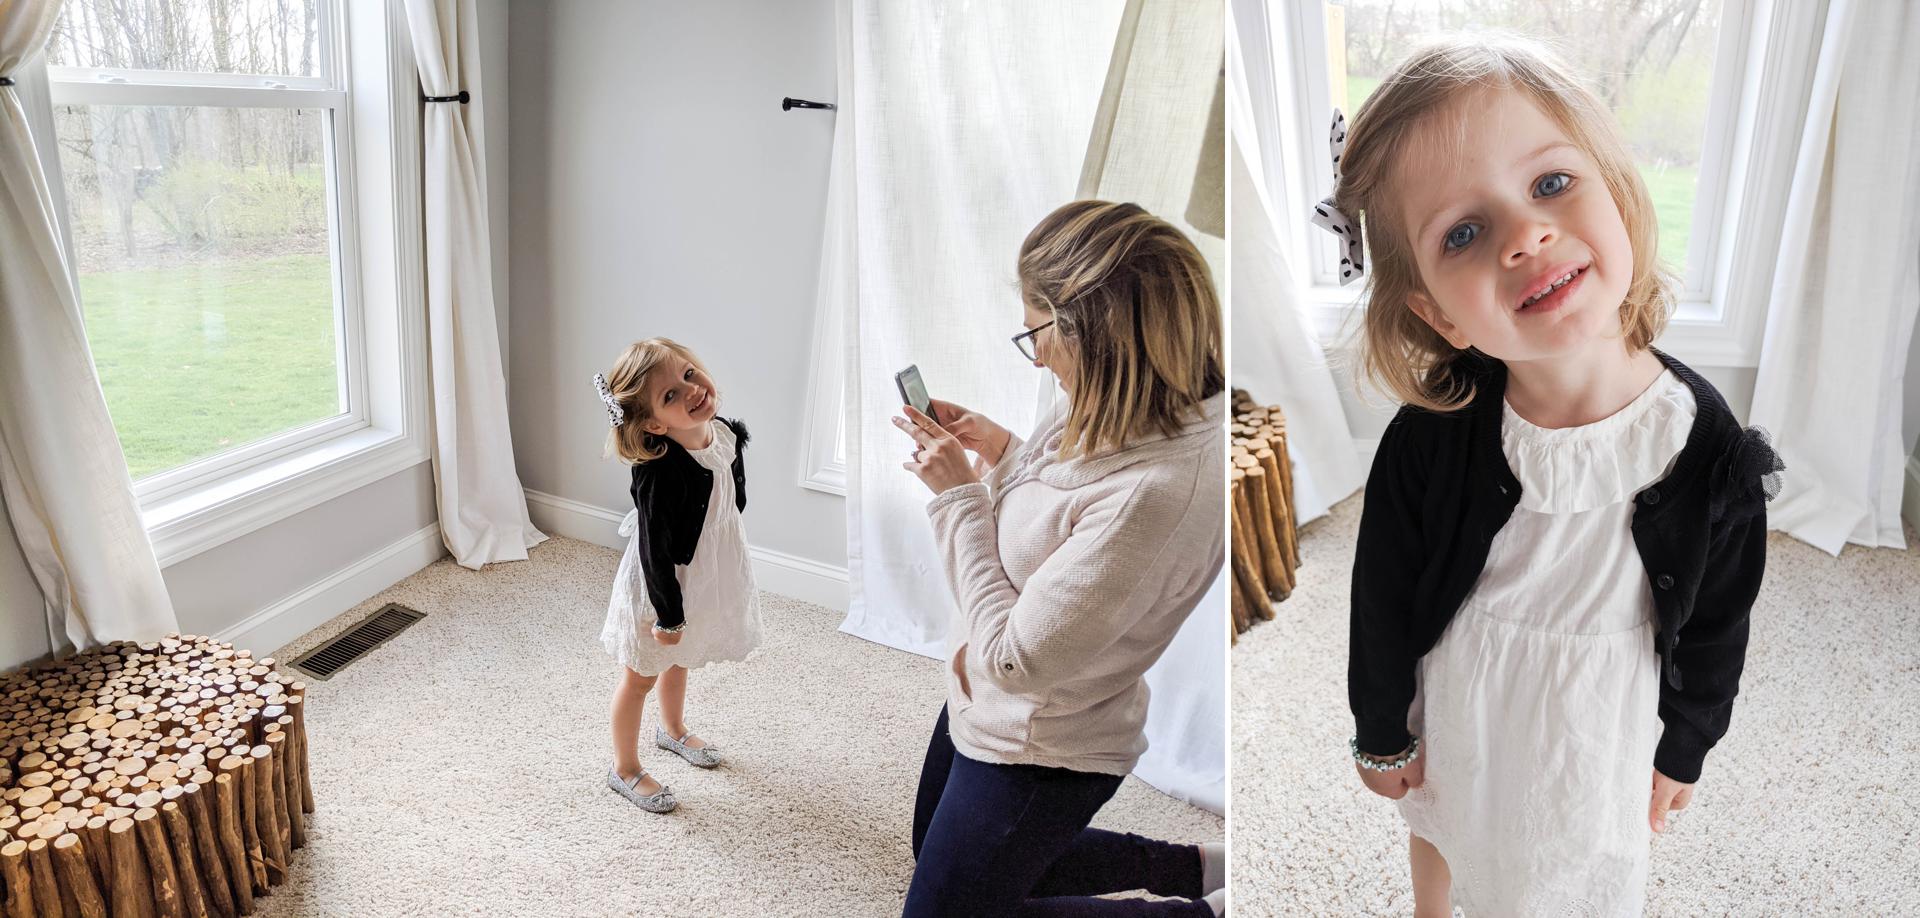
Next, I turned her around to face the window and I moved to the corner next to the window to avoid blocking light as best as I could. Notice how my shadow is casted next to her, not on her. Look at the difference of how her face glows! No more dark eyes.
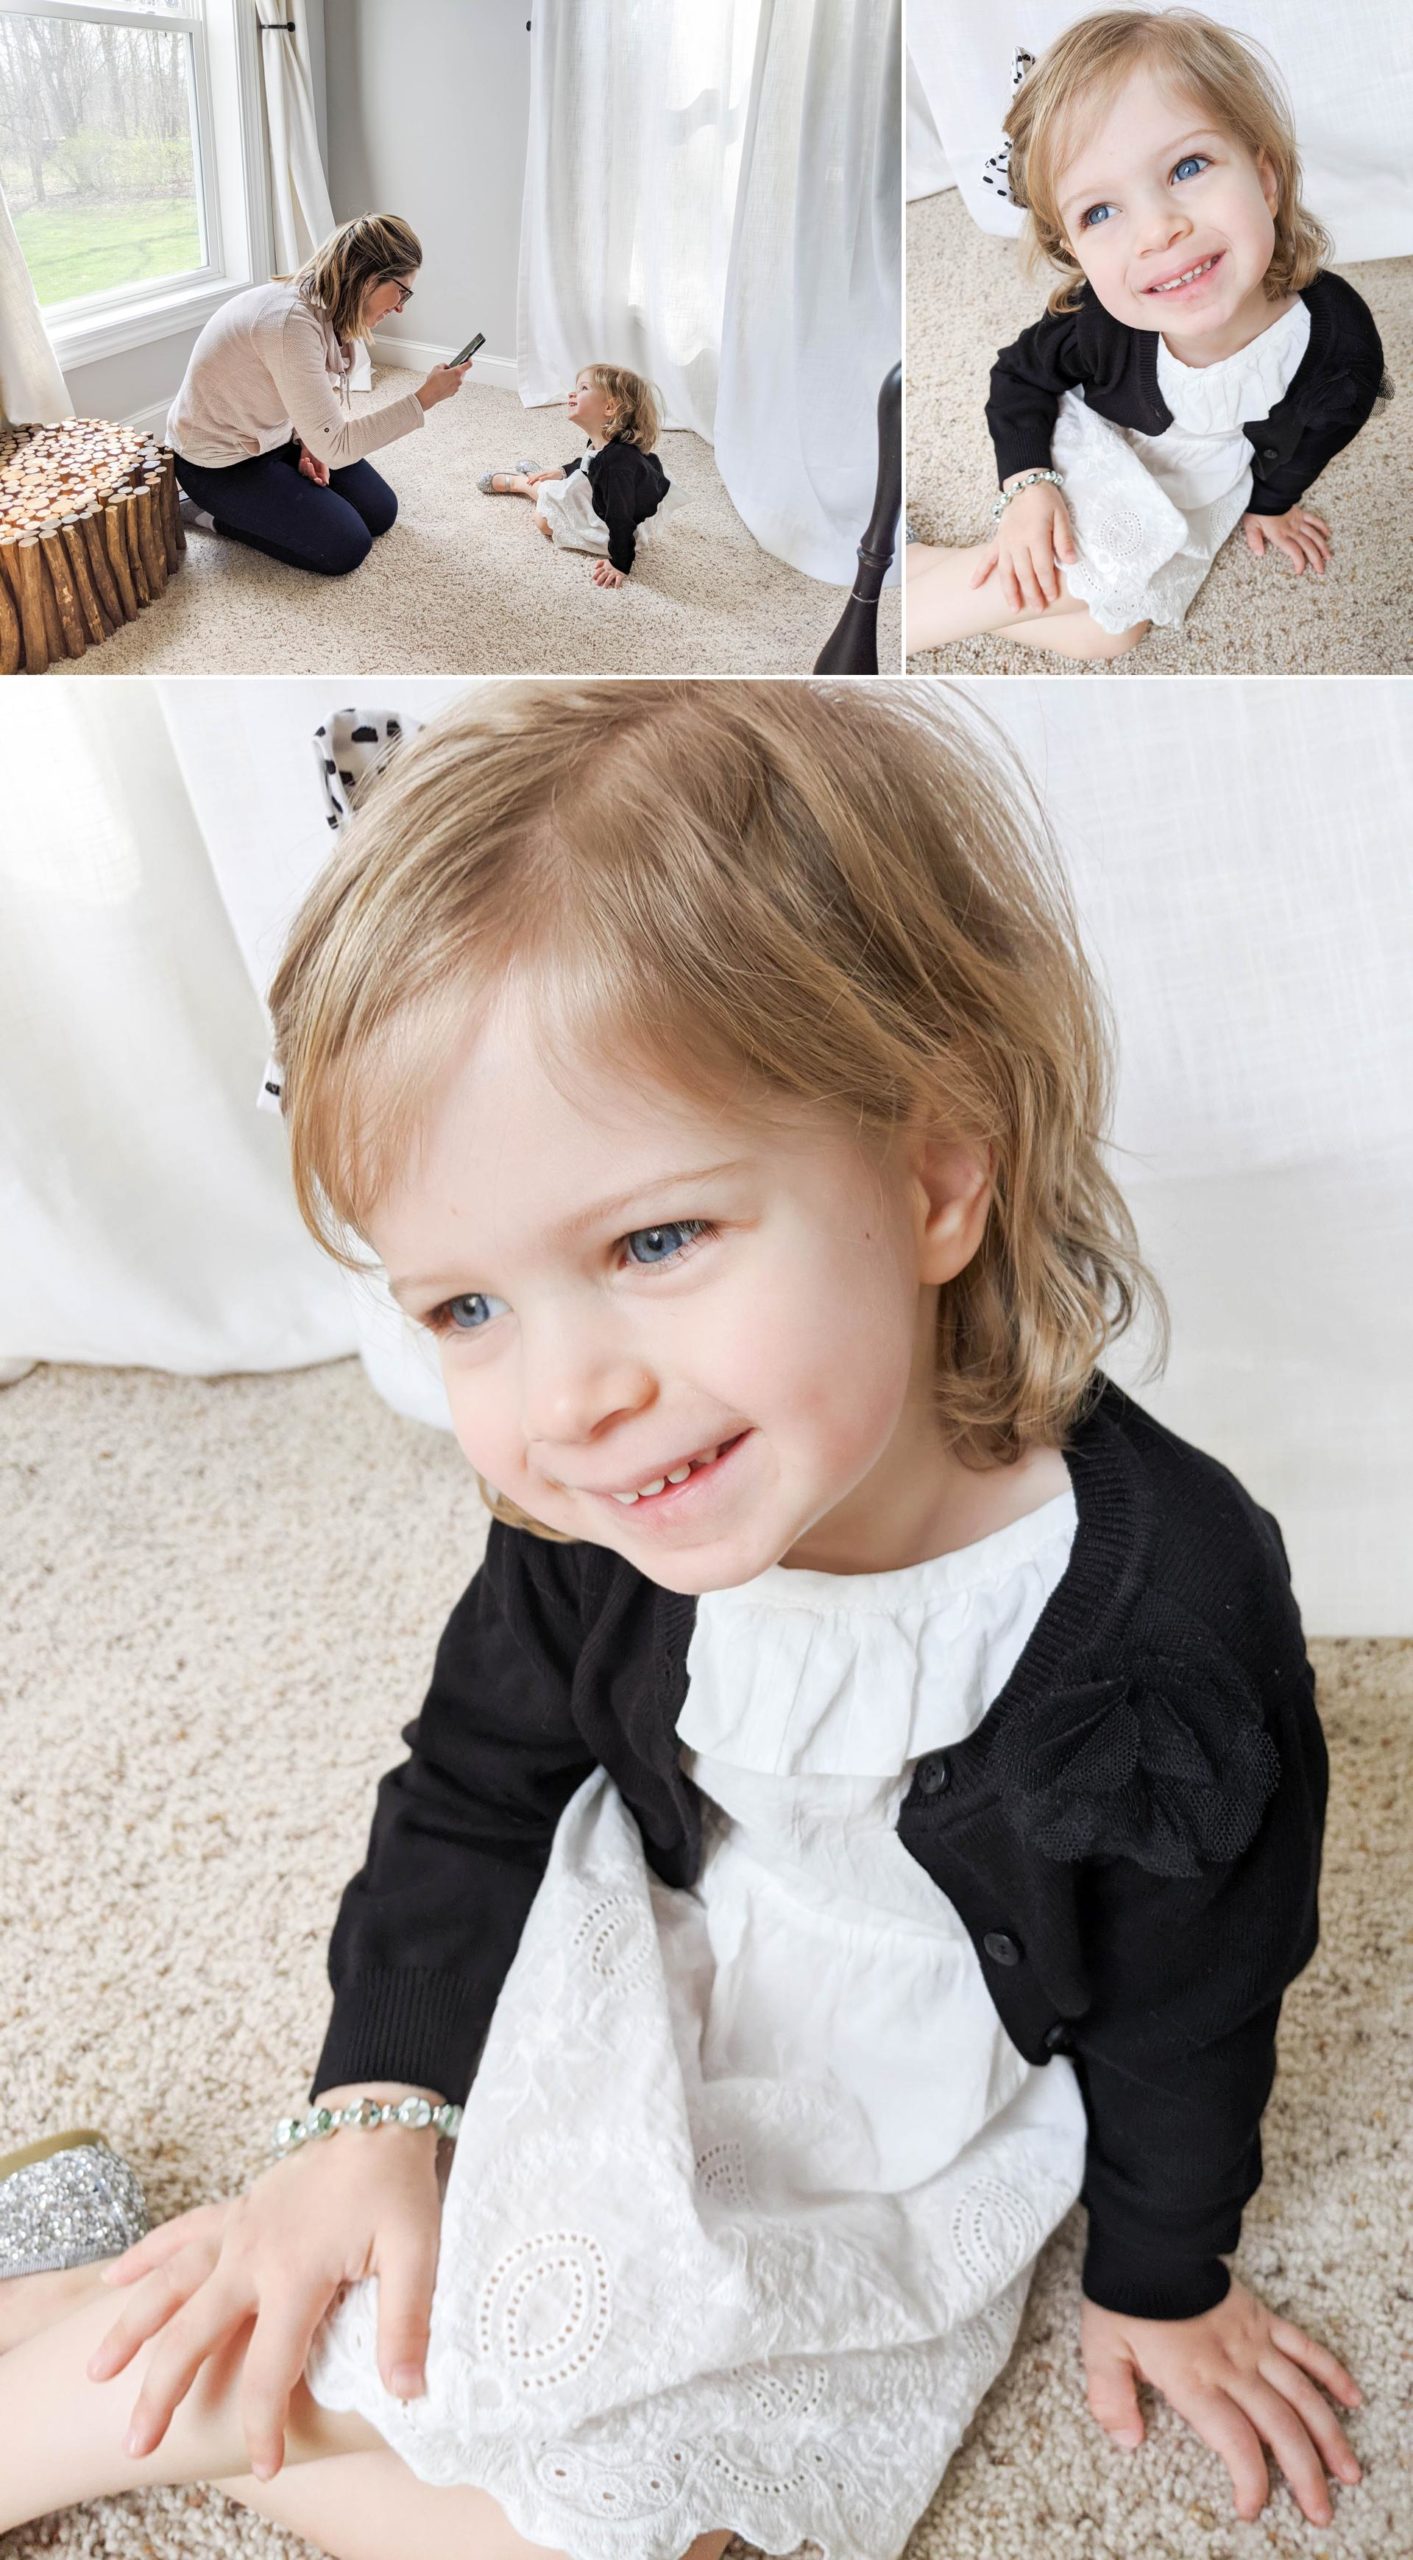
Next I moved more toward the center of the window. If you look closely you can see that where I’m at is now starting to block the light on my subject. There is actually a shadow between myself and my daughter. While it is not a bad photo, there isn’t a glow on her face and she’s starting to get a darkness around her eyes.
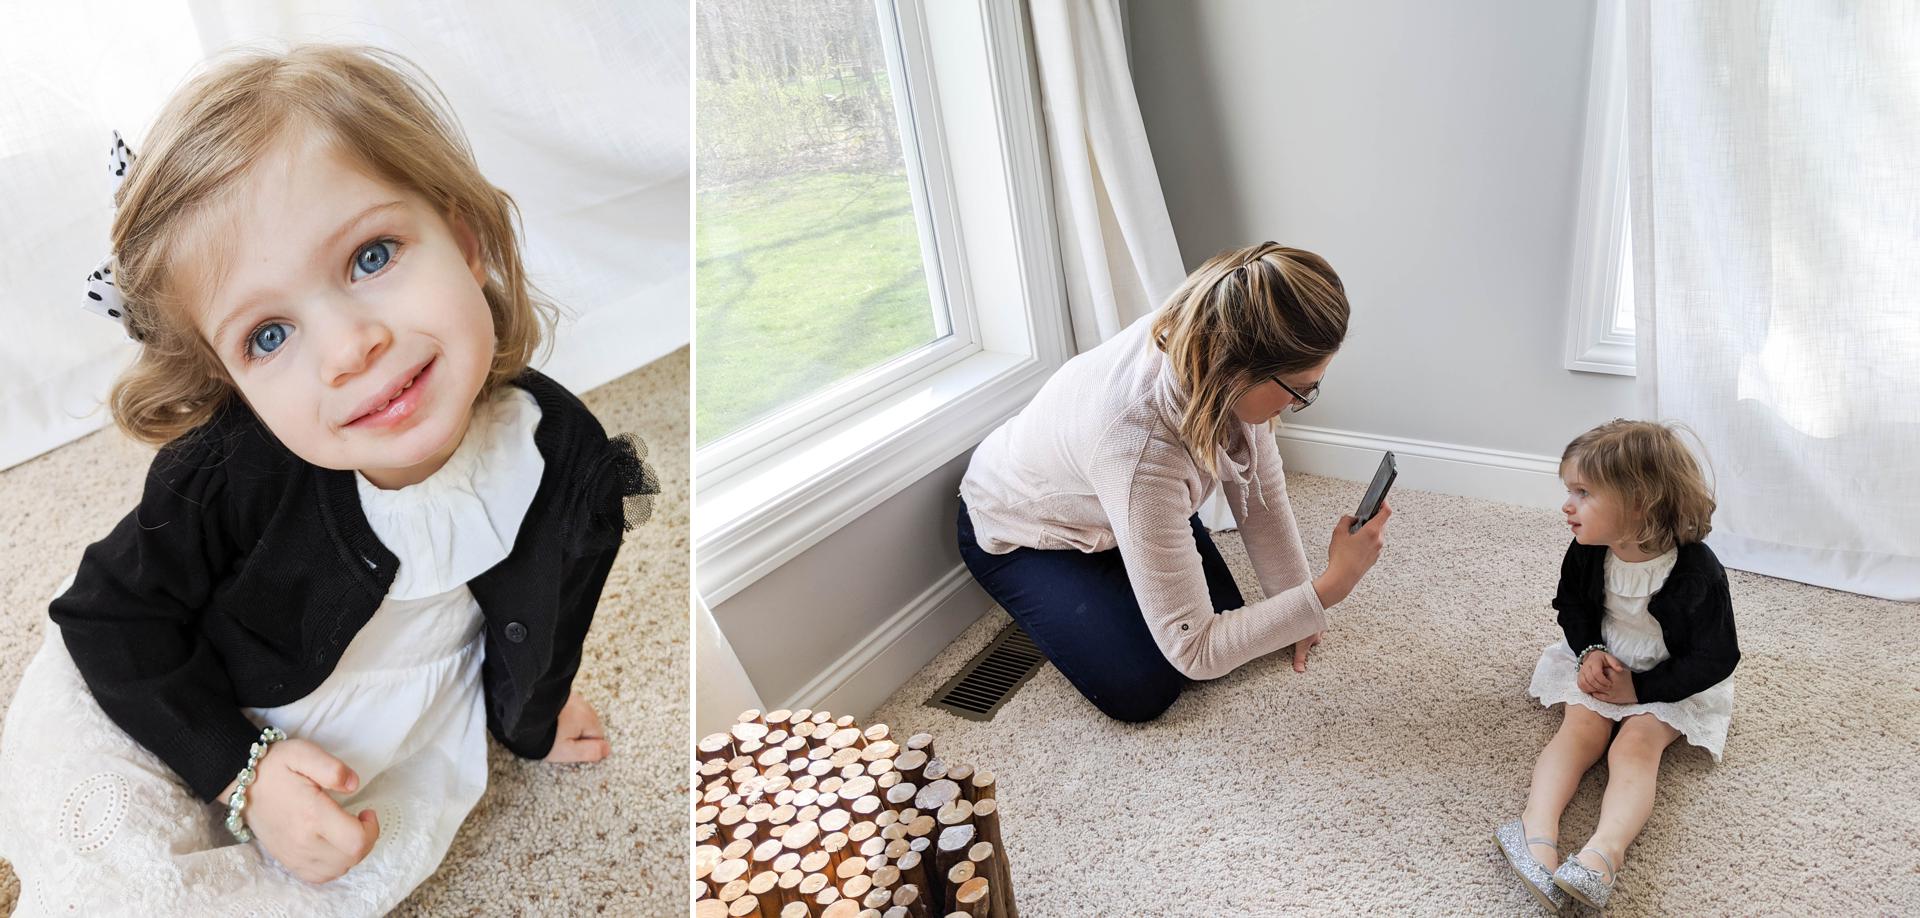
Next, I moved to the other corner of the window. Again, the light fills in and allows you to focus on what matters, those big blue eyes!
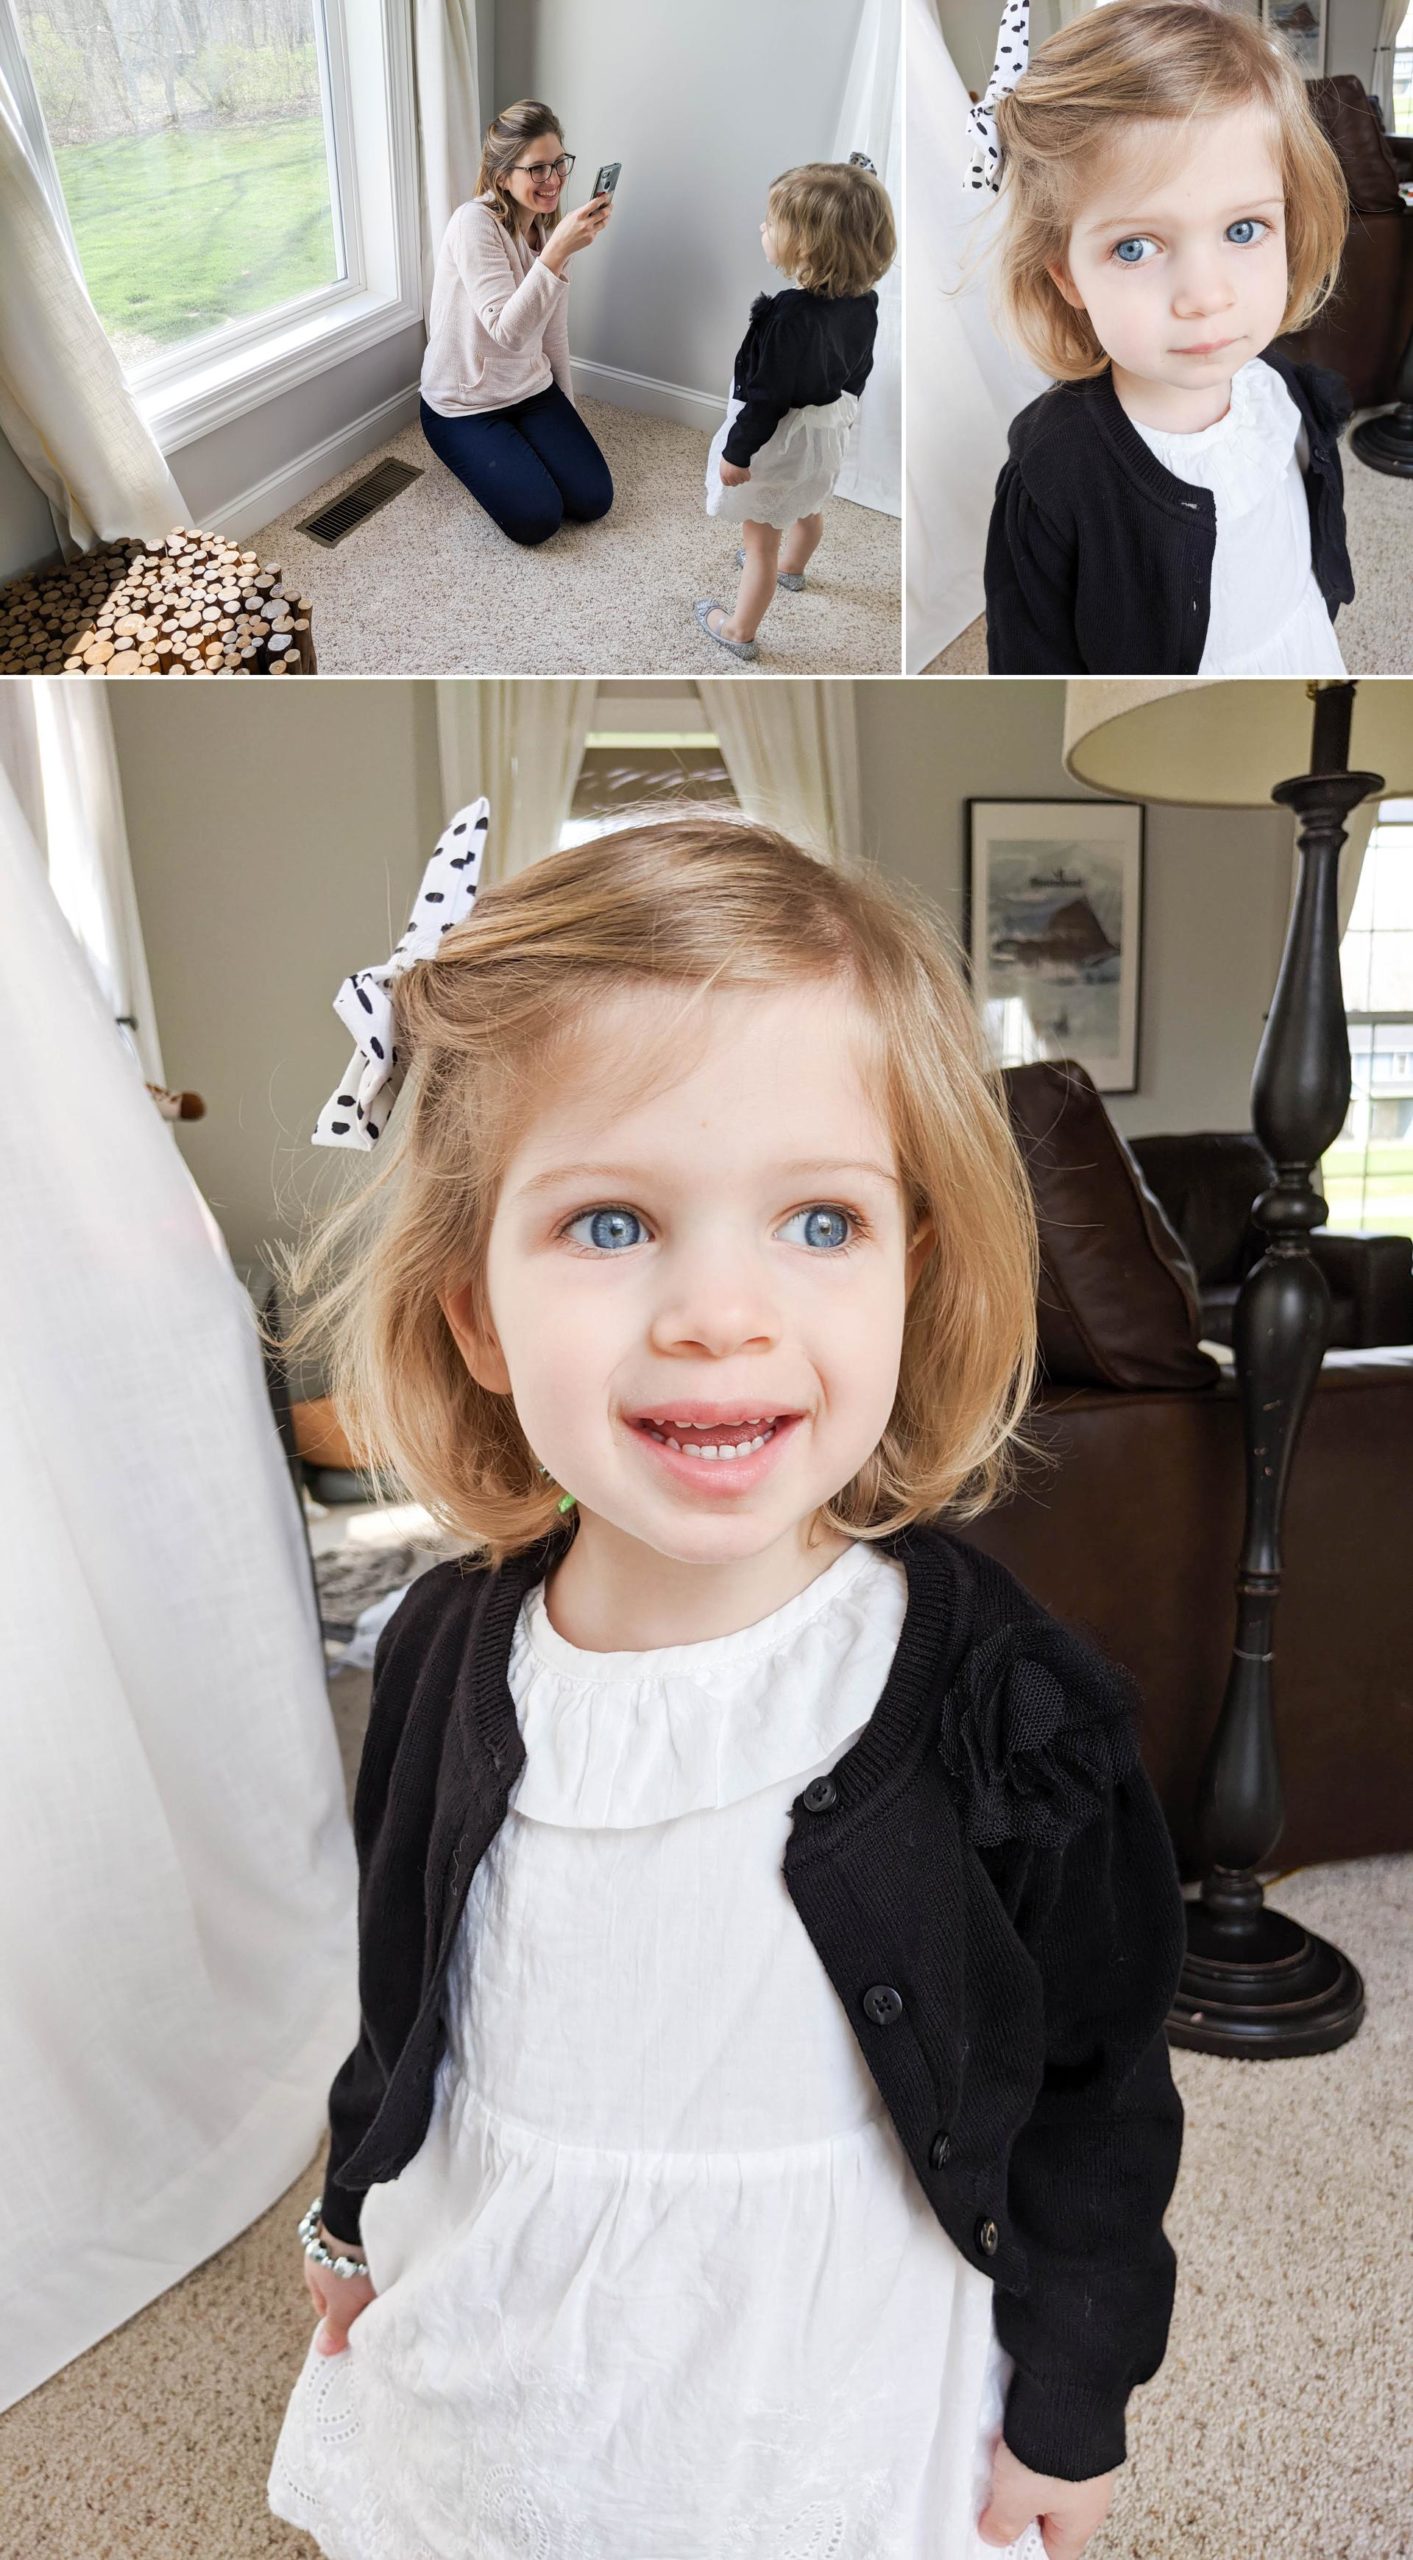
I hope this helps you to capture some beautiful moments! More to come next week!
Troubleshooting (pun intended):
Color seems off? Try turning off any lamps or lights, these can cast color (depending on the color temperature of the bulb).
Brownie points:
So, wait…what about shooting into window light? Shooting into a window is not wrong, I know many photographers who shoot this way and create gorgeous images! For the sake of keeping it simple there are many challenges that can come from shooting into the light, I myself do this to create some beautiful rim light around my subject. However, in this case, we are shooting in our homes, under a roof and our main source of light is a window.
Trying out the new tip? Send me a photo and let me know how it’s going!
THANK YOU!
You have successfully joined our list!